Showing posts with label Passover. Show all posts

Thursday 24 March 2022

Chametz Hunt House - Easter Hat Parade

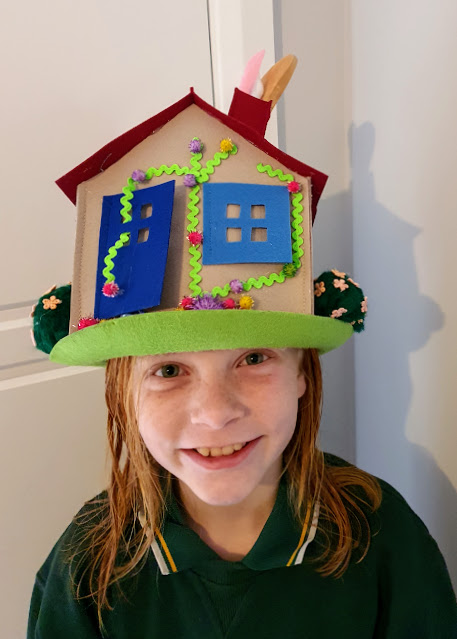
You may mistake this hat as the Easter Bunny's house, but that is far from reality. So without further ado, we present to you the Chametz Hunt House Easter Hat.


I didn't get around to sharing this Easter Hat we made for the Parade at school last year. It was close to not happening due to lock-downs, but it did go ahead, and parents were even allowed to watch. It was the first time I have been able to go to school for the Easter Hat Parade. I was able to take time off work for it because I have been permanent long enough to have some leave built up.


Anyway, it felt a bit weird sharing an Easter Hat too long after Easter, so I figured I would just keep it for this year and this year's hat can be shared next year too. It gives me a bit more time to get the blog post done.

After modifying the same paper mache hat we made for the last three years, it was time to make something new. The last three years were a sort of trilogy, with a prequel (Hosanna! Palm Sunday Easter Bonnet), the main event (Spectacular Spring Lamb Easter Bonnet), and a sequel (Magnificent Butterfly Resurrection Easter Bonnet). 


I intend to do another trilogy of hats for the next three (although not re-using the same hat), but we'll see if Tahlia remains interested.

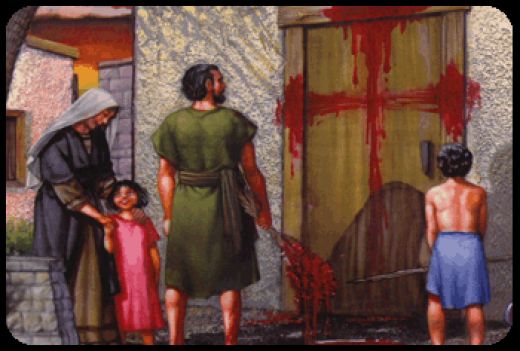
The foundation of Jesus death, burial and resurrection is presented in the Biblical feasts of Passover, Unleavened Bread and First-fruits respectively. In anticipation of fleeing Egypt, the Israelites ate unleavened bread as instructed by God because they did not have time to wait for the yeast to rise. Yeast also represents sin as it causes dough to puff itself up (like pride) and so when God gave the instructions for commemorating the flight from Egypt in the festival of Passover and the Feast of Unleavened Bread, the Israelites were told to rid their homes of any yeast (Chametz in Hebrew) and yeast breads ahead of celebrating those feasts.


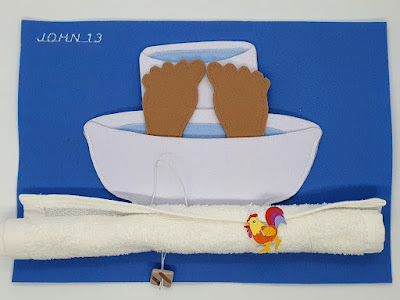
As part of the festivities, a game for the children developed called the Chametz Hunt. The mother cleans out the yeast products from the house, but hides 10 pieces or crumbs for the Dad to help the children find. They go on a hunt using a candle for light and when they find the crumbs, they use a feather to scoop the crumbs onto a wooden spoon and take them out of the house to be burned.

In a similar manner, we need to seek out our sins and get rid of them. Perhaps there are 10 pieces of bread to remind us of the 10 Commandments.


There are plenty of hiding spots on this hat to hide bread. Thankfully, I had made way too much bread to go into Pharaoh's Baker's baskets in our Genesis 40 - The Baker's and The Butler's Dreams Quiet Book Page so we used that to hide behind doors and windows. 

Tahlia sewed the windows and doors on. The completed roof was hot glued onto the walls rather than sewn. 


I think I sewed the walls and roof together. The chimney idea worked, which was a relief! I sewed the chimney together leaving about 1.5cm open at the bottom to fold out underneath the roof and sew down around the edges of the chimney hole in the roof.


At Tahlia's request, rather than securing it we made the hat to fit over the top of this felt St Patrick's Day Hat we had in our dress-up collection so it could still be used separately from the Easter Hat. I covered it in plastic food wrap to prevent any hot glue accidentally getting on the other hat while we were gluing the roof and things on.


We made a bin to burn the bread by covering a plastic shot glass I obtained from a supermarket sampling stand with some grey corduroy, securing it with hot glue. We scrunched up some red cellophane for the fire. 


We added pom pom bushes, a rik rak vine, and embroidered flowers as a decorative touch. They were all hot glued onto the side of the felt house rather than to the base St Patrick's Day hat.

Our fake battery-powered candle, toy wooden spoon, and feather all fit nicely into the chimney for storage.


We hope you will use our free Chametz Hunt House - Easter Hat Parade - Template Pattern to make your own version. It is a great way to help your kids share their faith in an exciting way. Why not seize the chance to develop their witnessing skills?


Follow Faith and Felt Obsession on FacebookPinterest and You Tube

Inspire us with your Christian themed Easter Hat ideas!

Thursday 10 March 2022

John 13 - Jesus Washes the Disciple's Feet Quiet Book Page

In John chapter 13, Jesus washes His disciples feet.


Memory Verse: “If I then, your Lord and Teacher, have washed your feet, you also ought to wash one another’s feet.” John 13:14 NKJV.


Materials needed to create the Jesus Washes His Disciple's Feet quiet book page:

  • A4 felt background sheet - I used mid blue
  • my free John 13 - Jesus Washes His Disciple's Feet Bible Quiet Book Template Pattern
  • the free template (first one) available at Nederig zijn - voetwassing by Alie Holman on the geloven is leuk blog - for the feet and bowl
  • felt in light blue and white
  • 1mm elastic in white
  • rooster button - I bought this (not an affiliate link)
  • button which looks like communion bread, or painted with nail polish and varnish to resemble some
  • nail polish in bread colours (optional)
  • varnish (optional - be careful, some varnishes can dissolve nail polish)
  • white face washer
  • sewing threads to best match the page
Firstly, cut out your pattern pieces from the templates. You may need to print the wash bowl a few times to be able to cut all the pieces.

Cut out a right and left foot from skin coloured felt and sew them down onto more skin coloured felt. Cut them out.

To create the back section of the bowl, sew the light blue water section to the white bowl back. Then sew the white bowl back onto more white felt and cut it out.

To create the front bowl section, sew the white front bowl section to white felt and cut it out. Do not attach the front section to the back section yet.

Repeat this process for the water jug, sewing the front section to the back section along the sides and base leaving the top open as a jug would be.

I chose a square button for the communion bread because that is the shape used by my church, and also the shape used for matzah in a Passover Seder. Matzah must be both striped and pierced (just like Jesus was), so I figured a button is already pierced, and the button I chose also had ridges - I just accentuated them when I painted it. You can of course use a round button if that is what your church uses. I imagine that matzah was round back in Jesus's day because that is an easier shape for people to make it at home.

Paint your button with the nail polish to look like communion bread. You may need to do more than one coat. Seal it with the varnish. Try to keep the holes in the button from being blocked so you can thread them onto elastic. Create a circle with the elastic and tie a knot to secure. Fold the circle onto itself to create a double loop and pin it in place underneath where the bowl will be sewn. Roll up the face washer and check that you have the right length to pull the elastic loops over the buttons on the other elastic loops to hold it in place for storage. Use zig-zag stitch to secure the elastic to the page. Repeat this with the rooster button.


Sew down the bottom section of the bowl along the sides and bottom to form a pocket for the jug behind. Sew down the top section of the bowl along the sides and bottom to create another pocket (inside the bowl) for the feet.

Finished! 

Difficulty Level = Intermediate

There are quite a few layers on this page, especially if you like things double sided like I do. To reduce the layers and make it easier to sew, you could just use the bowl to store the feet and jug and only make a single layer of white felt for the bowl back, sewing it down around the whole perimeter.


Key Learning Areas and Skills

  • John 13 - Jesus demonstrates the servant attitude He wants us to have at the Last Supper
  • Imaginative play - wash and dry the Disciple's and one another's feet
  • Fine Motor Skills - all quiet books encourage fine motor skill development
  • Hand-eye Co-ordination - all quiet books encourage hand-eye co-ordination


Read the Chapter

John 13

Devotional

I had planned to have communion bread and wine as the buttons holding the face washer to the bottom of this page, but as I discovered when I read the chapter... there is no wine mentioned in this chapter! That was a surprise. I ended up switching the wine for a rooster, as the prediction that Peter would deny Christ before the rooster crowed three times is mentioned. 

I made another page for a church quiet book
using the bread button and wine charm


Rather than focusing on the communion aspect of the supper, John focuses on the foot washing, and the last instructions of Jesus (in this chapter, the New Commandment to love one another).

I guess when Jesus says that if the whole body is washed, we just need to wash the feet, He is giving advice and comfort for when we find ourselves sinning even after we have been baptised. 

Foot washing was offered to guests when entering a home as a common courtesy. To not offer it would have been very impolite. Rich people wore sandals, but I think commoners had bare feet, and no mention is made of soldiers gambling for Jesus' sandals... so I think He probably didn't own a pair of shoes. You can imagine how dirty sandal-ed feet would get, let alone bare feet walking along a dusty or muddy road. It was probably littered with donkey and camel excrement as well. So I imagine having your feet washed was something both the host and the guest would appreciate, as well as all the diners next to them. I'm sure the meal tasted much better without that stench around.


Sacrifice of Song ~ HE WASHED 
THEIR FEET ~ Michael Crawford, Vocalist


If Jesus didn't own a pair of shoes, and borrowed a room for the Passover meal, asking his disciples to prepare it, I imagine that the room was not furnished with servants to wash anyone's feet. Not that I can imagine Jesus using servants anyway. Nevertheless, Jesus took the servant's role and washed His disciple's feet - something they were shocked to see. As usual, Jesus took an everyday object and used it to teach a profound lesson - one we are still pondering today.


Follow Faith and Felt Obsession on FacebookPinterest and You Tube

Does your church participate in the practice of foot-washing?

Saturday 11 April 2020

Magnificent Butterfly Resurrection Easter Bonnet

Although PanPanic ensured there was no Easter Hat Parade at school this year, they still held an Easter Hat Slideshow.

And we did our own parade at home.


Why we made the Butterfly Resurrection Easter Hat

As always we take the opportunity to both learn about Jesus' sacrifice and develop faith-sharing skills. I think it is important to practice sharing your faith from a young age. There are too many who shy away from proclamations - but I want to make sure Tahlia grows up to be bold and unashamed of the Gospel.


This year our Easter bonnet featured an empty tomb with a myriad of butterflies. Butterflies have long been a symbol of the resurrection because caterpillars seem to die in their cocoons and emerge shortly thereafter possessing a far superior body. We included so many butterflies as Jesus' resurrection gives us the reassurance that He is able to do the same for anyone who places their hope and trust in him.


Inside the tomb we see what Mary saw described in John chapter 20. I have heard that the angels sitting at either end of the stone where Jesus had been laid are supposed to remind you of the Ark of the Covenant which had two angels on top with their wings touching each other. On top of the ark between the angels was called the Mercy Seat and this was where the Shekinah Glory of God's presence shone. We tried to emulate this in a way, but the light was also supposed to give the impression of angels rejoicing and reflecting the angel-party mood I imagine was going on in Heaven despite the disbelief and grief on Earth.

How we made the Butterfly Resurrection Easter Hat

Two of my favourite butterflies


This video gives the basic gist of how we made the base of our butterflies from pipe-cleaners, although we did make a few changes. Next we wrapped the wings in lace and secured it with hot glue. We also added beads to the ends of their feelers. I knew we would need a lot, so we started making these well before Christmas, but even so we did get a bit of help from some friends to make so many. Tahlia hot glued all bar one of the little ones in place and did an excellent job don't you think?


by One Little Project


We had one little one left over so she did wear it as a ring.


The large butterfly on top was also made from pipe-cleaners and wrapped in lace.


We started the layers from the outside edges first so that each layer overlapped the next without getting in the way.


This hat is the third in a series where we have re-used the same paper mache hat we made in Kindergarten.  After removing last years beautiful felt flowers we gave it a quick vacuum to remove the dust and debris.


This year we enclosed the arch/doorway from the last two years to form the empty tomb. We marked where we wanted the tomb to go to and used plastic shopping bags to pack the space to be filled. Then we covered that section with three or so more layers of paper mache before removing the shopping bags and covering from the inside as well.


We also marked the edge of the entrance to the tomb on paper and formed a base for the stone out of cardboard cereal box. This got covered with layers of paper mache too.


The tomb and stone were painted inside and out in white by Tahlia, and I touched up the sky and grass after the damage done by removing the felt flowers from last year.


I had been hoping to find a frosted plastic box in a jewelry store but had no luck. Happily, and perhaps Providentially, we attended a wedding a few weeks before the hat had to be finished. The wedding favours came in a perfectly sized white box with a transparent lid. I managed to take a photo for you with one chocolate left in there before they all got demolished. Each box had two chocolates inside originally!


After removing the divider, three LED rings fit exactly inside the box - we bought this 6 pcs LED Rubber Rings from AliExpress (not an afiliate link). I bought extra in case some did not work and I'm glad I did as all the rest broke very quickly. The box is fixed in place with blu-tak so it can be removed to allow the rings to be turned on and off.


The angels were bought from a craft store but I have seen similar in dollar stores too - they were hot glued in place.


See the other Easter Hats in this Trilogy

  1. Hosanna! Palm Sunday Easter Bonnet - focuses on Praising Jesus' ability to save
  2. Spectacular Spring Lamb Easter Bonnet - focuses on the first Passover and the Cross
  3. Magnificent Butterfly Resurrection Easter Bonnet - this one!


Follow Faith and Felt Obsession on FacebookPinterest and You Tube
I would love to see and share your Christian themed Easter Hats!

Tuesday 16 April 2019

Spectacular Spring Lamb Easter Bonnet

Last Year we set the bar for the remaining years of Tahlia's primary school Easter Hat Parades. I set myself the challenge of making an admirable Christian hat (no eggs or bunnies) that would be far from embarrassing and that would get people talking about the Good News of Easter, um, I mean Passover.


This year I hope we have again risen to the challenge with our Spring Lamb Easter Bonnet.

This idea came with one week to go before the event. Thankfully. I had planned something else, but it just didn't have the pizzazz I was looking for and I never ended up buying all the needed items.

My first job was to secure a stuffed toy lamb - and not a Shaun the Sheep look-alike. It had to be without blemish like all Passover lambs. Happily my workmates were in the know about an awesome nearby op shop and enthusiastically took me on a lunch-time shopping adventure. Praise God this little cutie was waiting for me!


The inspiration for the Spring Lamb Easter Bonnet came from the 10th Plague from the First Passover.

You realise a lot of things when you try to convert Bible text into images. Obviously others have realised it before me because I found some awesome pictures online that demonstrate what happened to the Israelite's doors when they followed God's instructions to kill a lamb and use hyssop to paint blood on the lintel and both doorposts as protection against the death of their first born sons (Exodus 12:22).


Image Source


Who knew there was so much imagery in the old testament around the cross?


Tahlia did get to show her hat to her class and talk about it. I'm not sure that what she said would have made a whole lot of sense to them, but it was good witnessing practice. And it was a wonderful learning experience for us to share together.

You might think that I made the hat, but let me reassure you, Tahlia helped a lot.

Most importantly, she proudly wore it on the day!


Together we stripped back the Palm Sunday Easter Bonnet from last year.

She stirred the paper mache glue mixture and applied another coat.


She re-painted the hat.


Tahlia insisted we iron the felt before making the flowers. A step I was thinking we might be able to skip.


She cut the pipe cleaners.

She cut the red, white and orange flower pieces out and even helped with hot gluing them all together.

I made the bunch of hyssop.


I rolled strips of red felt for the blood to fill the bowl and glued one end of the ribbon for the cross to it. I glued everything down - the ribbon to the screws and itself, the felt to the bowl and the bowl to the hat.


I used a small screw driver to make holes to insert the screws. I had planned on using nails but I couldn't find them. I think screws worked well anyway because they had a lip which stopped the ribbon slipping off.

Tahlia wanted to make a door for the archway but we ran out of time. I thought it would be better without, but I think Tahlia was right to want a door. It might have helped the ribbon cross stand out more.

She helped glue everything onto the hat.


So that the lamb was not ruined by hot glue I employed more felt and my secret weapon safety pins!


We watched quite a few YouTube videos on how to make felt flowers. These were our favourites:


If you can't work out how I made the pink carnations you will have to beg me to do a tutorial. I'm not planning to do it unless someone asks though!


EDIT:

See the other Easter Hats in this Trilogy

  1. Hosanna! Palm Sunday Easter Bonnet - focuses on Praising Jesus' ability to save
  2. Spectacular Spring Lamb Easter Bonnet - this one!
  3. Magnificent Butterfly Resurrection Easter Bonnet - focuses on the joy and hope of the Resurrection


Follow Faith and Felt Obsession on FacebookPinterest and You Tube
I would love to see and share your Christian themed Easter Hats!

Tuesday 5 February 2019

Isaiah 53 - Messiah ben Joseph Quiet Book Page

Isaiah 53 is a Messianic passage which describes the sacrificial death of the suffering servant (Messiah ben Joseph).


Memory Verse: “But He was wounded for our transgressions,
He was bruised for our iniquities;
The chastisement for our peace was upon Him,
And by His stripes we are healed." Isaiah 53:5.


Materials needed to create the Messiah ben Joseph quiet book page:

  • A4 felt background sheet - I used mid blue
  • four small nail looking shank buttons
  • felt scraps in skin colour, hair colour, wood colour and parchment colour
  • matching thread colours, and red thread (for the blood)
  • air erasable marker (or pen)
  • letter beads - or ink pads and small alphabet stamps or a permanent marker etc
  • hot glue and glue gun
  • my free Messiah ben Joseph template download
Cut out your template and most pieces from the felt scraps in appropriate colours. I find for intricate shapes (such as the section that needs to be cut from the inside of the legs) it is sometimes best to use a pen to draw the shape onto the felt and cut it out that way - of course you need to flip the pattern over and draw on the inside so it will be hidden when sewn together. I only cut the front of Jesus' body out and waited until I attached the front to the back to cut out the whole body.

The draw and cut method was certainly useful when trying to keep within the lines whilst sewing on Jesus' whip stripes. And of course you need to sew on the wound details in red thread before sewing the front body to the back. Jesus most likely received 39 stripes. Jewish law forbade any more than 40 (Deuteronomy 25:3) and in an effort not to cross this line, 39 were delivered just in case someone miscounted. Since the Roman whip had three tails on it, they would have delivered 13 strokes to make a total of 39 lashes.


39 stripes


Sew the front of Jesus' body to the back and cut it out. Then sew on the face - don't worry that you can see the stitching on the back as the hair will cover it. Use red thread to make small buttonholes to fit your buttons on the feet/ankle and wrist/hand areas.

For the hair, cut two fronts and sew them together, two backs and sew them together and then join the doubled front to the doubled back along the top of the hairline to a spot at about just above the nape of the head. Leaving the ends open will allow the hair to fit over the head and split over the shoulder. You will also be able to lift the hair at the back to see all of the stripes. Position the hair and secure in place using red thread on a zig-zag and/or decorative stitch to sew across the head to make a bloodied crown of thorns.

To make the sign for the top of the cross, sew the two white pieces of felt together and make a buttonhole the same size as the others using matching thread this time. It should be positioned down a ways from the top to allow room to roll the ends up. Use hot glue to keep the ends rolled in place. Hand sew on some beads to make a list of names on one side and to say "Messiah ben Joseph" on the other.

I did also try using stamps and ink for the lettering, but I don't think my ink was very good quality. You can see that it ran/separated a little, especially at the 'M' - it looks worse in real life. I have seen felt stamped before that turned out well. If you have good quality ink it might work better.


Sew down the cross onto your page and lay Jesus' body on top. Push sewing pins through the buttonholes to mark the position needed for the shank button nails. Add the sign and do the same. Hand sew the buttons on.

Finished!

Difficulty Level = Intermediate.

It's not really hard, just a bit fiddly in some sections.

Key Learning Areas and Skills

  • Isaiah 53 - Taking our place and dying on the cross was not an easy task. This prophecy in Isaiah was fulfilled in such detail. Sin causes devastating consequences.
  • Imaginative Play - Jesus died on the cross so we don't have to. Turn the sign at the top of the cross to reveal either your name/s or Messiah ben Joseph. You get to choose who pays the price for your sin.
  • Buttoning - He died to pay for our sin so it is appropriate that our hands put the nails through.
  • Counting - see if you can count the 39 stripes on Jesus' back.
  • Fine Motor Skills - all quiet books encourage fine motor skill development
  • Hand-eye Co-ordination - all quiet books encourage hand-eye co-ordination


I love you this much...


Read the Chapter

Isaiah 53


Devotional

I did question whether or not making this page was a good idea. The topic is not really a fun one and I didn't want to encourage disrespectful play. However, it is also the central topic of Christianity and it is rather difficult to create a Bible full of quiet book pages without featuring the cross.

The page was inspired by the buttons which looked to me like nails. I prayed about if I should go ahead with the idea and then decided to count how many buttons I had... if there were not enough then in a way it would be decided for me. I found exactly four and felt assured of approval.

Part of the message I wanted to portray with this page was that it is MY personal sin that Jesus died to pay for. Therefore it is appropriate that my own hand does the buttoning.


In times past Christians have blamed Jews and labelled them Christ-killers and given rise to massive antisemitism. Jews were driven from their homes and massacred during the crusades and the First and Second World Wars. I want to sincerely and profusely apologise for that. Anyone who wants to shift the blame in that way does not understand the gravity of their own sin, a point which the death of God's Son should certainly drive home.


The wages of sin is death (Romans 6:23). Effectively, that cross had my name on it until I decided to ask Jesus to take my place. That is what the scroll meant to demonstrate... it has 'many' (unfortunately I could only fit four) names on one side, and the other is labelled with 'Messiah ben Joseph' our suffering servant.


In Jewish eschatology there is a belief that there are to be four Messianic figures: Elijah, Messiah ben Joseph, Messiah ben David and the Righteous Priest termed collectively the Four Craftsmen. There are correlations with the Christian belief in the two comings of the Messiah. At His first coming, Jesus fulfilled the role of Messiah ben Joseph, which Christians term 'the suffering servant', and at His second coming, we believe that He will fulfill the role of Messiah ben David or what we term 'King Messiah'. We also believe Jesus is a Priest in the order of Melchizedek. In Malachi 4, Elijah was prophesied to return and in the New Testament people asked John the Baptist 'Are you Elijah'? Although he denied being Elijah or the prophet - Moses (John 1:21), perhaps an effort to deflect attention away from him and towards Christ, Jesus did imply he played the role of Elijah (Matthew 17:12). But of course the real Elijah and Moses did return prior to the cross at the Transfiguration (Matthew 17, Mark 9, Luke 9, 2 Peter 1).

Interestingly enough here are some of the traits attributed to Messiah ben Joseph and how I can see them relating to Jesus' first coming:

  • He is the leader of the lost ten tribes and/or all Israel - Christians believe we represent spiritually the lost ten tribes who were scattered among all nations. It is said that in the future He will bring back the exiles and rebuild the land of Israel. Christians believe that this will be fulfilled by Jesus at his second coming.
  • 'Ben' means 'son (of)' in Hebrew, and Jesus was known as the son of Joseph (his legal father).
  • Joseph is also meant to refer to the tribe of Joseph (Ephraim) which was in the north and is linked to both the lost ten tribes and the physical northern area of Israel (i.e. Nazareth/Galilee area where Jesus was from). 
  • A stone tablet called Gabriel's Revelation refers to a Messianic figure from Ephraim who will break evil in three days - Jesus breaks the power of evil by dying on the cross and rising to life again in three days. Messiah ben Joseph is also associated with the rebuilding of the temple (hence why he is a craftsmen) - something Jesus claims he will do in three days referring to his bodily resurrection. 
  • Messiah ben Joseph is willing if necessary to die battling evil forces and the enemies of God and would receive an inadequate burial - which indeed happened to Jesus. Perhaps not in the way the Jews envisioned a battle would take place but it was the greatest battle ever fought and won. 
  • Later God would resurrect the dead and a peaceful Messianic era would follow with Messiah ben David ruling (sounds like Heaven to me). 

Your thoughts are welcome...


Follow Faith and Felt Obsession on FacebookPinterest and You Tube

Hearing from you gives me great encouragement!