Wednesday 19 October 2016

Tahlia's Quiet Book - Brush Your Teeth Pages

A Brush Your Teeth quiet book page is a tonne of fun! A toothbrush was one of Tahlia's first Christmas presents, and she absolutely loved it. This page has also been a hit. It used to be her favourite page when she was about two and a half. It stayed her favourite for a long time.


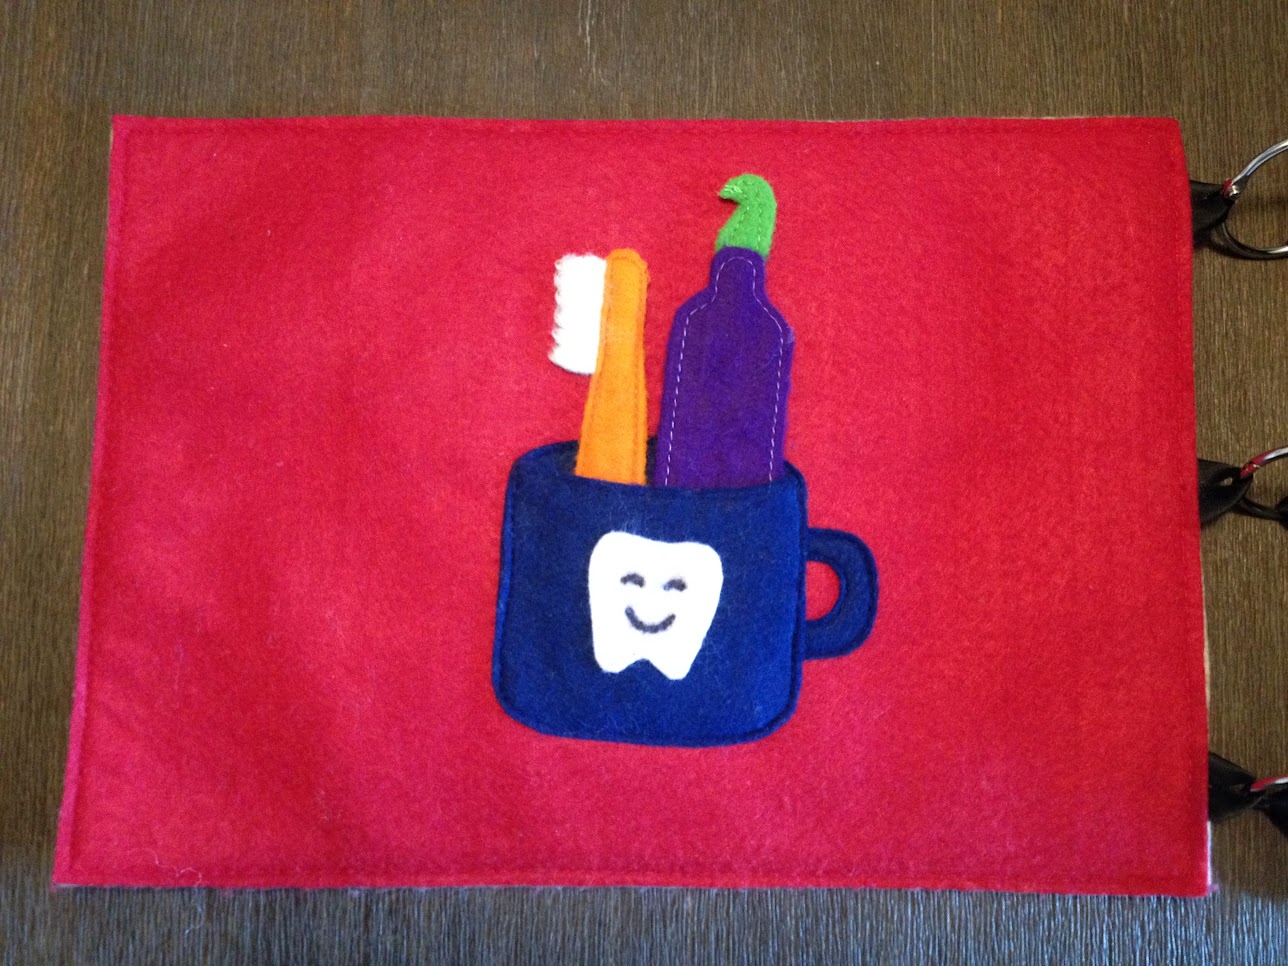
I made the toothbrush, toothpaste and cup using part of Stephanie's Brush Your Teeth quiet book template from Imagine Our Life. At the time I was just getting into quiet book making and sewed a plastic piece from a folder cover in between the two felt layers for the toothbrush and toothpaste in an attempt to strengthen them. It worked OK, but I have since discovered thick stiffened felt from Spotlight. I would definitely use that instead if I ever make it again. I would also use that for the white brush bristles as our toothbrush has unfortunately fulfilled it's purpose in Tahlia's own mouth quite a bit and become a bit sad and soggy. A small price to pay for the amount of fun she was rewarded with!

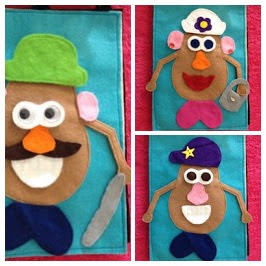
Mum and I made the mouth together. I did the teeth freehand on the machine, but I gave an example to give you an idea of what I did (or what I would try to do if I did it again and wanted a new improved version) plus my Mum's template for the mouth. As you can see in the picture, my teeth are very uniform unlike the example I gave in the template. Once you have followed the instructions on the template, cut down between the teeth and turn them inside out before pinning them on the page and placing the mouth over the top to get the positioning right. Sew them down and then sew the mouth on top to cover the gummy sections. Thanks heaps once again Mum!!


Follow Faith and Felt Obsession on FacebookPinterest and You Tube

Who is glad you don't have teeth like this mouth?!!

Saturday 15 October 2016

Tahlia's Quiet Book - Pony Page

This pony quiet book page is super cute and interactive. It promotes imaginative play through the feed bowl, bridle and lead, and the removable blanket.


The pony quiet book page was made by my friend at her baby shower, and she kindly made extras for her sister and myself too. I knew she was horse-mad so I had made her a horse template by doing a rubbing of my Mum's coffee table, which has embossed horses and chariots running around the edge of it. She took one look at it and said "No" and announced she would draw her own pony. It's something I have watched her do a thousand times, so I'm not sure what I was thinking doing that either! By the look on her face I could see her completely re-designing the page in that instant.

To make the mane, she wound wool around a ruler, carefully slid it off, and pinned it under the pony. My Mum sewed down the pony for her because I asked her to man the sewing machine during the party. Once it was sewed down, my friend cut the mane where it had been folded over the ruler.


We didn't finish the quiet book pages at the party. She finished her pages at home for me later, and I'm so glad she did. Not just because it took a lot of work off Mum and I, but because there is no way it would have turned out so good if I was in charge. The bridle, lead and blanket edging are made from a thin ribbon, and you will have to copy as best you can from the picture. The ribbon was left over from her wedding, so that's pretty special. She did a great job, don't you think!

She designed the page herself, and has allowed me to share the template with you - Thanks heaps!!


Follow Faith and Felt Obsession on FacebookPinterest and You Tube

Do you know a little friend who LOVES ponies?

Friday 14 October 2016

Wall Christmas Tree

As we didn't have a Christmas tree and I didn't want a heap of things to move each time we have to get a new rental, I decided to make a felt wall Christmas tree. I already had all the supplies needed, so that made it handy and cost effective!


Whilst I am aware that Christmas is not Christian in origin, it is a wonderfully fun time of year when people are willing to listen to stories about Jesus.  So why not take advantage of this, and "make the most of every opportunity" (Colossians 4:5).

I forgot to take a photo of how to draw and cut out the tree, but you can see how on Cheryl's blog That's What Che Said.  Just fold a piece of green felt in half and draw a zig zag tree pattern on and cut whilst folded.  If you don't have confidence, you could opt for a simple triangle tree.

We used a metallic cardboard star I kept from my husband's yr 12 formal.  It is stuck to the wall with double sided tape, as is the felt tree.


Baby is admiring the Christmas tree.

Normally I always double my felt so it is strong and looks more professional, but for this project, I wanted it to be fun, quick, and easy.  Also, I was a bit concerned if I doubled the felt that it would be too heavy and not stick to the tree.  No-one would find that very fun...


We have:

One star topper - the star of Bethlehem is fascinating - read about the astronomical phenomenon here. Use a large star colouring sheet from here. There is both a five pointed star or a star of David, which may be more appropriate since Jesus was the son of David.

Two doves - like the two doves mary and Joseph took to the temple on the eighth day for Jesus' circumcision.  They were so poor that's all they could afford.  God did not favour His son when He sent Him into the world.  He was born in a manger, not a palace.  The template I used was found at Simply Creative Ways.

Three angels - has already inspired a conversation about our guardian angels; use this tutorial and pattern by Laura from the blog Bugs and Fishes.

Four trumpets - used to announce Jesus' birth.  He was actually born around the feast of trumpets in September/October; use the trumpet image available here as a template.

Five bells - the poem "The Bells of London" posted below is by Marjorie Anisborough Decker, the author of The Christian Mother Goose Book Trilogy. You might want to visit her blog and browse her awesome book collection; I used a colouring sheet and cut them out of sparkly felt.

Six gingerbread men - just for fun, but mankind is after-all the reason Jesus came into the world; I drew around a cookie cutter, but you could use a colouring sheet from from mrprintables.com as a template. Decorate with puffy paint and jewels for the icing and lollies. I have fond memories of making gingerbread at Christmas with my Mum and sister. Mum always used to make such lovely decorations that I wanted her to do these ones for me too. She did a terrific job once again!


Seven snowflake ornaments - to remind us Jesus' sacrifice makes us whiter than snow; use the tutorial by Laura from the blog Bugs and Fishes.

Eight candy canes - click here for a poem to remember the reason Jesus came into the world; use a colouring sheet from mrprintables.com as a template and glue on ribbon for stripes.

Nine pointy baubles - just for fun; I used a colouring sheet available here and hot glued rik rak on to decorate.

Ten presents - Jesus was God's presence pun intended to us, the wise men gave presents to Jesus, we need to be generous to others; use another colouring sheet from mrprintables.com. Cut out the square from one colour of felt and the ribbon in one piece from another colour. Hot glue the ribbon onto the present.

Eleven star lights - the wise will shine like the stars, see Daniel 12:3; once again I used a colouring sheet available from mrprintables.com.

Twelve round baubles - just for fun; I traced around an upturned glass and sewed a layer of metallic spotted mesh on top of the orange felt.

Image Source
Image Source
Free Printable available here!

If you don't want to spend a lot of time making ornaments, you could always try backing ornaments printed on material with felt. Or just cut out a heap of circles in lots of different colours. Tahlia discovered that crocheted hexagons will also stick to the felt tree, so that might be another easy option if you know how!


If you are looking for hours of fun without a lot of cost, I found a printable wall Christmas tree for coloring in.  As you need to assemble it from various printed pages, it doubles as a jigsaw puzzle.  It looks amazing!!  Might be our Christmas project for next year.


Thursday 13 October 2016

Tahlia's Quiet Book - Grapes, Butterfles, Bee and Potato Head Pages

These next quiet book pages form the major part of Tahlia's quiet book. Most of them were gifts made by other people to contribute to Tahlia's book.


The grapes and butterfly pages were made for Tahlia by my sister. At the time, grapes were one of her favourite foods. The string is meant to be a caterpillar and it can be threaded through the hole it has eaten in the leaf. The leaf pattern came from Purl Soho, and the grapes were drawn by my Mum. The butterfly was made using a colouring in sheet printed from the internet, and the cocoon and tree were drawn by my brother-in-law.


The butterfly racing page was made by my awesome friend!  The butterfly buttons on the ribbons came from an op shop.  There is no pattern for this one, but you could probably use something like this flower printed out in a few different sizes.


This page was made as an extra for Tahlia while we were making my friend a book at her baby shower.  It was made by my friend's mum.  Thanks heaps!  The bee came from a $2 shop.  The hive pattern was made by Stephanie from Imagine Our Life, and the flowers are from Purl Soho.


My Mum put in an amazing effort into helping me finish these pages.  We did Mr Potato Head about three times over for two friends books as well.  Thanks so much Mum!! The template was made by Jocelyn from Sunshine, Lollipops and Rainbows. The hats are reversible, some with a button on one side and not the other, and some with a patterned felt on the reverse. We also made two sets of eyes each, so there would be green, blue, brown and googly options.


I know the walking stick is meant to be a moustache, but this is for kids, right?


Follow Faith and Felt Obsession on FacebookPinterest and You Tube

Which page do you like the most out of these ones?

Monday 3 October 2016

Happy New Year!

It is now the Biblical (and Jewish) New Year, so I want to wish you a Happy New Year. May you be inscribed in the Book of Life!

Image Source

Actually, the Bible has two new years six months apart, much like we do today with the financial new year. This is the actual new year, not the one installed after the Exodus, which I have a feeling was done so that the month numbers would correspond with the new year and autumn festivals falling in a month numbered seven. Hopefully you will see the significance unfold in some future posts.

I began working on this blog at the Biblical New Year last year, so it is now the one year anniversary of Faith and Felt Obsession. I have had a great time learning and I hope to continue improving my sewing, crafting and blogging skills.

I find it fascinating that the Biblical New Year begins in Autumn (well in Jerusalem it is Autumn at this time of year). Spring is the logical time for the beginning of the year, or so I thought until I realised it wasn't in God's books. He created everything mature. Adam was fully grown, trees were fully grown, even fruiting so it seems. So I guess it follows that God created the world beginning in the mature season of Autumn.


Follow Faith and Felt Obsession on FacebookPinterest and You Tube

Do you celebrate the Biblical New Year?